

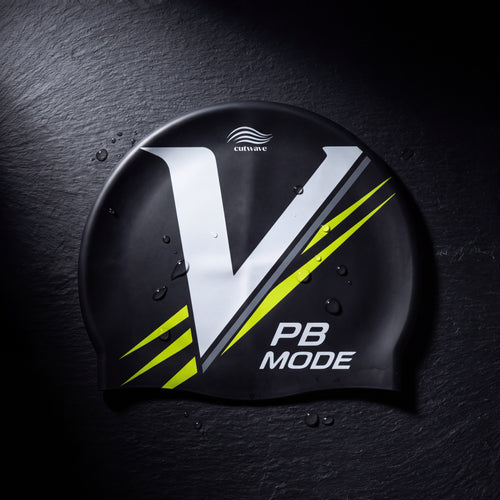


For most children in regular swimming lessons, choose a child-sized cap that feels snug without hurting, is simple enough to put on calmly, and matches the child’s hair volume. Start with fit, then choose material: a soft fabric cap may be an easier starting point for a reluctant beginner, while a correctly sized silicone cap is a practical option when the lesson or pool expects a close-fitting cap.
The best cap is not automatically the smallest one you can stretch over a child’s head. A cap that pinches, rolls upward or needs constant adult rescue will become the part of the lesson they dread. Both SwimOutlet’s cap guide and Simply Swim’s guide for young swimmers separate children’s fit and material needs from adult buying advice. Use the decision process below rather than choosing by age label or colour alone.
Choose the size before the material or design
Look for an explicit junior or children’s size when the swimmer has a smaller head. “One size” does not mean one comfortable fit for every child, and age bands are only a starting point because head shape and hair volume vary. If a brand provides measurements, use those instead of guessing from the child’s age.
A workable lesson cap should cover the crown and sit around the hairline without folding over the eyes. The rim should make even contact, but it should not leave the child complaining of pressure before the lesson begins. Our swim cap size guide explains the difference between a normal snug fit and a cap that is simply too small.
- Too small: difficult to stretch over the crown, sharp pressure at the rim, repeated complaints, or the cap immediately rolling upward.
- Too large: deep folds, loose pockets, a rim that gaps, or the cap moving as soon as the child pushes off.
- Hair-volume mismatch: the rim seems correct, but a high bun, thick curls or braids create one large lump and push the cap away from the head.
Do a dry fit at home before lesson day. Leave enough time to remove the cap and try again; turning the first fitting into a deadline is an impressively efficient way to make everyone hate it.
Silicone or fabric: use the lesson, not marketing, to decide
| Priority | Better starting point | Trade-off to accept |
|---|---|---|
| Easy first experience | Soft fabric cap | Water passes through, and the fit is less close |
| Regular lessons or club practice | Child-sized silicone cap | Needs careful fitting and may feel firmer |
| Long, thick or textured hair | Junior or long-hair shape with extra room | Extra volume must still be distributed evenly |
| Pool-issued or event cap | The required cap | Comfort options may be limited, so practise first |
Fabric caps are soft, stretchy and generally straightforward to pull on, which can help a child who dislikes a close rim. They let water through, so choose one for comfort and hair control—not to keep hair dry. Silicone caps sit closer to the head and are common in lessons and training. They still do not create a watertight seal, and a child should not be told that wet hair means the cap failed.
Skip latex when the child has a known latex sensitivity or when you cannot confirm the material from the label. Do not rely on colour, texture or a marketplace title to identify a cap’s material. Product labeling beats guesswork.
Match the cap to the child’s hair
Short hair needs a secure size, not a pouch of empty material. Long hair needs enough room to spread the hair over the back and crown without stacking it into a hard topknot. Braids and curls need space without aggressive compression. The practical goal is an even head shape that the cap can cover, not a fashionable bun hidden under industrial tension.
- Remove sharp clips, hairpins and bulky accessories.
- Gather long hair low and loose, or divide it into sections around the back of the head.
- Keep braids flat rather than piling every braid in one spot.
- Choose extra-volume construction when the hair will not sit evenly under a standard junior cap.
For more detailed preparation, use our long-hair cap guide or the separate guide for braids, curls and textured hair. Those hair-specific questions deserve more than the usual advice to “just tuck it in.”
Run a two-minute comfort check before the first lesson
Put the cap on at home and ask specific questions. “Is it fine?” usually earns the answer that ends the conversation fastest. Ask whether the rim pinches above the ears, whether the forehead feels squeezed, and whether the child can turn the head normally. Watch the cap for a minute rather than judging it the instant it goes on.
- The child can look left and right without the rim pulling sharply.
- The cap stays above the eyebrows and does not cover the eyes.
- The ears can be left outside or partly covered according to comfort; do not force a painful position.
- The rim lies mostly flat instead of rolling into a narrow band.
- The child can wear it for several minutes without escalating discomfort.
A correctly sized cap can still feel unfamiliar. That is different from pain. If the cap hurts, take it off and change the size, shape or material; do not treat discomfort as character building. Our guide to cap pressure and headaches has a troubleshooting sequence for persistent tightness.
Practise putting it on without turning it into a wrestling match
Let the child see and touch the cap first. Show where the front, back and centre line sit. For a young swimmer, an adult can hold the cap open with the pads of the fingers while the child keeps the chin slightly down. Set the front edge near the hairline, stretch over the crown and lower the back edge. Keep fingernails away from the material.
Do not pull a cap down by one thin section of rim, and do not stuff loose hair upward after the cap is already tight. Lift a small section with finger pads and guide the hair underneath. The full step-by-step fitting guide covers the two-hand method and common reset points.
Give the child one job: hold the front edge, tuck one side, or press the crown while the adult lowers the back. As confidence grows, transfer another step. Independent fitting matters more than shaving three seconds off the changing-room routine.
Choose by the lesson scenario, not just the cap shelf
A first five-child beginner class creates different problems from club training. Match the cap to what will actually happen on deck:
- Child is anxious about the first lesson: prioritise a calm home trial and a material the child tolerates. The objective is a cap they will keep on, not the theoretically sleekest option.
- An adult will help every time: choose a cap the helper can open with finger pads and position without catching hair. Practise the same method so the child knows what comes next.
- The child must dress independently: test whether they can find the front, open the rim and reset a bad attempt. A slightly easier cap they can manage may beat a closer cap that always needs rescue.
- School or club supplies a uniform cap: ask for one early and rehearse with that exact model. Buying a comfortable personal cap does not override a uniform rule.
- Hair volume changes between sessions: braids, curls or a new hairstyle can change the fit. Recheck the cap rather than assuming last month’s setup still works.
This is the part generic size charts miss: a technically correct cap can still be wrong for the routine. The child, helper, hairstyle and venue rule all have to work together.
Use this lesson-day decision rule
Choose the cap that passes all four checks: the size matches, the hair fits without a hard lump, the child can tolerate the material, and the pool accepts it. If one check fails, change that variable before buying another colour.
- Ask the pool: Some lesson programmes require caps; others leave the choice to families. The venue’s current rule wins. Our guide explains why pool cap rules differ.
- Start with junior sizing: Move to another shape for hair volume rather than forcing an adult cap onto a small head or a small cap over a large hairstyle.
- Pick comfort for the use case: Fabric may be a low-friction introduction; silicone is the closer-fitting option for repeated lessons.
- Test before the class: A five-minute home trial is cheaper than discovering a bad fit beside the pool.
Product-fit boundary: CutWave currently lists standard silicone caps, not a verified child-specific size. If the swimmer needs a junior-labelled cap, choose one that explicitly provides that fit rather than forcing a standard cap to work.
For a swimmer whose required fit is compatible with a standard cap, design can help them recognise and enjoy their kit. You can browse CutWave’s swim cap designs only after confirming the fit and the lesson provider’s rules. A funny design is a bonus, not a substitute for the correct size.
Related guide: artistic swimming kit for beginners
FAQ about swim caps for children
Do children need a swim cap for swimming lessons?
It depends on the pool or lesson provider. Some require caps for hair control or local pool rules, while others make them optional. Check the current lesson information before buying, then choose for fit and comfort rather than assuming every pool uses the same rule.
How tight should a child’s swim cap be?
It should sit snugly with even contact around the hairline, but it should not cause pain, cover the eyes or roll into a narrow pressure band. Immediate pressure complaints, sharp rim marks or repeated rolling are reasons to try another size or shape.
Is silicone or fabric better for a beginner?
Fabric may be easier and softer for a child who resists a close fit, but water passes through it. A correctly sized silicone cap sits closer and is a practical choice for regular lessons. The better option is the one the child can wear calmly and the pool accepts.
Will a swim cap keep a child’s hair dry?
No standard swim cap guarantees dry hair. A close-fitting cap can reduce direct exposure and keep hair controlled, but water can enter around the rim. Plan for wet hair after the lesson.
What if a child refuses to wear a swim cap?
Check for a real fit or sensory problem before insisting. Try the cap at home, switch size or material, keep the first practice short, and let the child take part in fitting it. If the pool requires a cap and no tolerable option works, ask the lesson provider what alternatives it accepts.